We’ve been holding out on you…

April 26, 2011

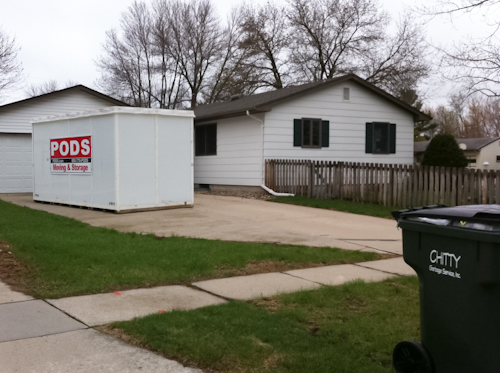
Not intentionally, of course. We just hadn’t gotten around to telling you yet. Here’s a hint:

In case that isn’t obvious enough (or if you were just distracted by the trash can bearing the best family name for a garbage service ever), that huge crooked POD in our driveway means we’re moving.

As much as we love our house, we’ve known for awhile that it wasn’t cut out to be our forever home. Besides, we had so much fun redoing the basement in this house that we’re sorta itching to do it again 😉  Actually, Nate found a new job near Jordan Creek, which is about an hour south of our house in Ames. So that seemed like a good excuse to look for a new house about 30ish minutes south of Ames. Then we’d both have a fairly equal, reasonable commute (the new house is more like 45 minutes south of Ames, but who’s counting?).

So we decided to start casually looking for a new home, fully expecting the search to last all summer and well into the fall. We had a few pretty specific items on our wish list and I’m still haunted by the experience of my parents taking 10+ years to find a house (haunted is actually much too strong a word, I really loved visiting Open Houses with my dad nearly every Sunday growing up and I was pretty excited to experience that with Nate). Thats why I can honestly say we were surprised when we fell in love on our second day of open houses. It fits most of our criteria, including one of the most important items: a 2 car garage IN ADDITION to a large workshop for Nate and studio for me. That means I’ll get to park my car in the garage all year instead of just when it snows! And it won’t be covered in saw dust! Yay! The house is old enough that there are plenty of rooms ripe for a remodel, but new enough that we don’t need to worry about updating the electric, plumbing, insulation, etc. (aka the expensive and not-fun stuff). It was actually built in 1983, the year I was born. Another fun fact: its next door to the house where my best friend in elementary school, Lauren, lived. Her family has since moved to a new neighborhood though. Does that make us next-door-neighbors-once-removed?

The big move will happen mid-May. In the meantime, Nate and I are packing the POD, tackling some never-quite-finished projects, and cleaning the whole house from top to bottom so we can get it on the market ASAP (anyone interested?). We’re also spending plenty of time in our beloved basement, soaking up movies on the 8 foot projector screen and caressing our infamous bar, since we won’t have a place for either in the new house (don’t worry, although bar stays, the bar top will be staying in the “family”). Given the outrageous amount of stuff we have to move *cough -Nate’s workshop- cough* a few shots at the bar might also be in order.

Be sure to click on the picture for maximum viewing horror.

Rather than ending with a photo that may give you nightmares and me panic attacks, I’ll leave you a happier picture. Just look at us; 4 years younger, one of us a little less hairy, taking a proper photo for our Facebook invite to our housewarming party, and totally unaware that said housewarming party would involve “bobbing for beers” in our kitchen and a mysterious turd left on our utility room floor. Good times. Good house.

0

VEISHEA Glass Sale: Saturday 10am-6pm in Old Sweeney

April 15, 2011

Its VEISHEA weekend! Too bad its also rainy, windy, and 41 degrees outside.

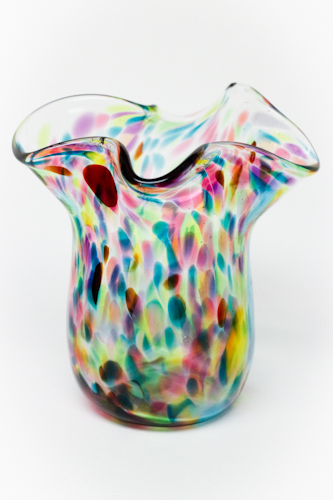
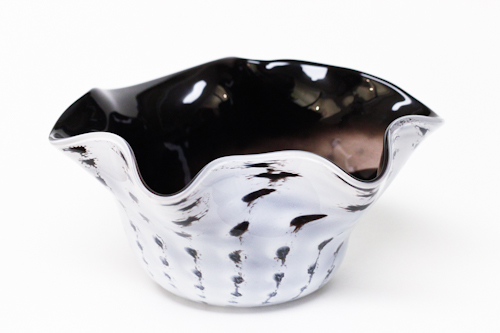
To anyone wandering around the Iowa State campus tomorrow, please stop by the ISU Gaffers’ Guild glassblowing studio. You can warm up, watch the glassblowers work their magic, and buy glass made by members of our club (hint: Mother’s day is only a few weeks away). All proceeds from the sale go right back to the club so that we can keep on making beautiful glass. We’re located in Old Sweeney and have a brand new entrance on the south side of the building, which is just north of the water tower. The sale and demos will last from 10am-6pm on Saturday April 16th.

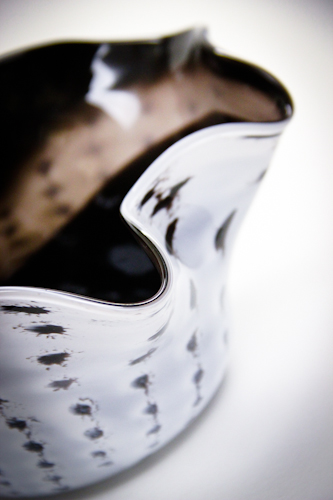
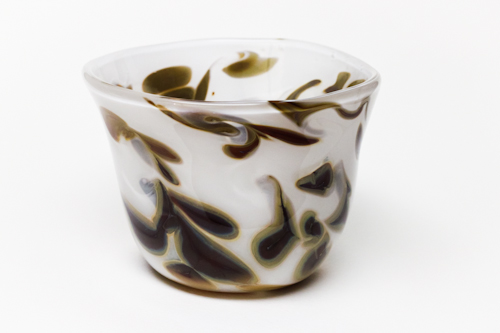
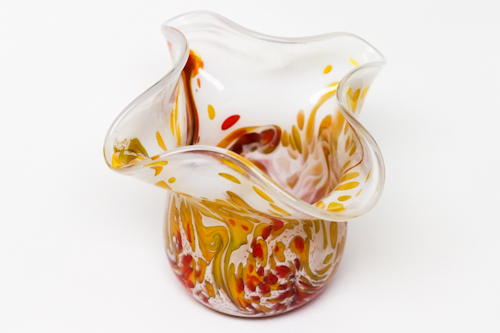
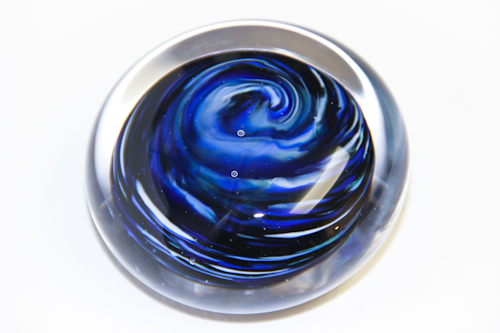
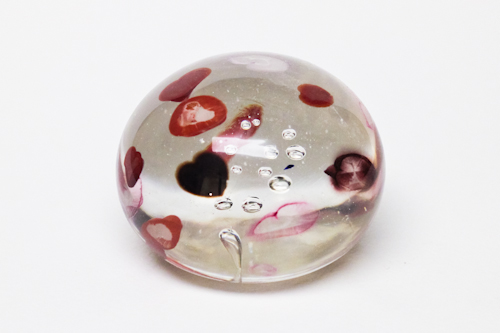
Here are some pieces that I contributed to the sale this year:

The Art Mart Sale will also be going on tomorrow. It is from 9am-3pm in the M-Shop at the Memorial Union. Glass from our club will be available as well as pottery, printmaking, jewelry, and more – all made by local artists.

0

We’ve Been Published!

April 14, 2011

Has it really been over 2 MONTHS since we posted anything?

Its not that we haven’t done anything worth posting, its just that we’re busy people. To quote Chris Gardner of ReadyMade Magazine, “Nate and Liz Gordon are busy. Like, crazy busy.” Woah! Did you see that? I just linked you to an interview with Nate and me on the ReadyMade website!

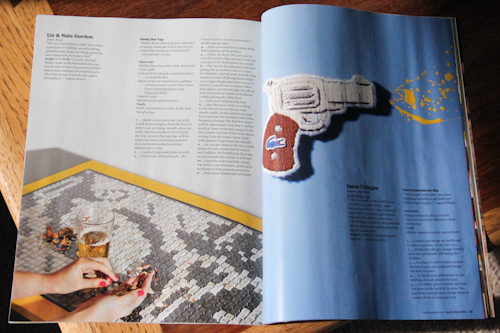
Okay, lets back up for a second. Do you remember this post? In it, I begged anyone and everyone to visit the ReadyMade Top 100 Contest page and vote for our “Geeky Bar Top” (oh how I wish I had come up with a more inspired name for it) so that we could qualify for the contest. Well, here’s a great big THANK YOU to everyone who signed up, voted, and has subsequently been receiving random DIY emails for the last 4 months. Because not only did we qualify, we made it to the top 25! That means that they actually used our project instructions to make their own version of our Geeky Bar Top. Then they put it in the current issue of ReadyMade.

And here it is.

.

Now lets flip to page 58…

.

and zoom in on the names in the corner…

We may not have won the Grand Prize, but the fact that we made it into the magazine is just awesome. And our project just so happens to be the second one mentioned, right after the winner. I know that doesn’t necessarily mean that we were second place, but we like to pretend it does 🙂

We’re having fun finding our names pop up all over the ReadyMade website too. Like I said earlier, we were contacted for an interview that they put on website. We also found out that we were a top pick for a couple of the judges – Eric Wilhelm, the CEO of Instructables and James Nestor, a writer from San Francisco. My favorite surprise though, was finding this video of  the crew at West End Salvage in Des Moines making the bar top for the magazine. I’m pretty sure they used glass instead of resin, but the intricate pattern is amazing.

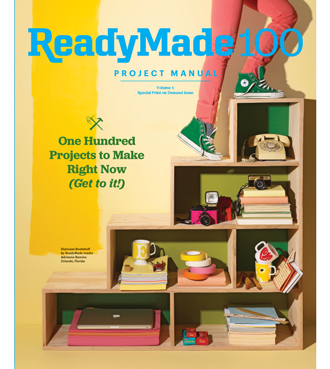
There’s also a print-on-demand book available with the entire top 100, which will hopefully be living in our new bookcases (do I smell a potential blog post from Nate?) soon.

So that’s my little story about how our bar top was immortalized. And if you haven’t read Nate’s not-so-little story about the all the work that went in to the original, you can catch that in this post.

For all 3 of our loyal readers out there, we’ll try to post more often than every 2 months, but no guarantees. We’re “very busy newlyweds” you know 😉

0

Liz Learns that Reupholstery (and Refinishing) is Harder than it Looks: Part 2

January 27, 2011

At the end of my last post, the cute little ISU Surplus chair was looking as though it had seen better days. It had been stripped of the old upholstery and sanded, though not as thoroughly as I had intended. This very unflattering photo should jog your memory:

.

If you’ve read our bartop post, you know that Nate and I have a thing for black furniture. So it should come as no surprise that this chair would also be getting an “epic black” treatment. So far, we’ve tried just about every method we can think of to achieve that look – paint, stain, India ink, drawing ink, and dye. Dye is hands down our favorite. Unfortunately, completely sanding this chair down to bare wood so that I’d be able to wipe dye on every surface wasn’t going to happen (I didn’t feel like dousing it in solvents either). So we decided to experiment with a new technique – polyurethane mixed with black dye.

To start out, I brushed dye onto the entire chair and let it soak in wherever it could. The poly-dye mix would be sprayed on in thin coats. So I thought I’d try to save myself some effort by making the chair darker to begin with.

.

The following day, I put the darkened chair on a little base with wheels and rolled it over to our spray booth. Maybe if you ask nicely, Nate will write about his awesome spray booth. Its definitely worthy of a post.

.

With spray gun in hand (for the first time!), I got to work.

.

I sanded between each coat to remove any texture from overspray. Since this was my first spraying project, I tended to get a lot of overspray because I was a little timid with the trigger. Had I been spraying too heavily though, I would have drips and sags in the finish that would have taken a lot more work to sand out. Finding the perfect balance between applying too much and too little finish takes some practice.

.

After a good 5+ coats of dyed poly, I was happy with the color and was ready to seal it in with clear poly.  I actually lost count of how many clear coats I sprayed on because each coat I kept thinking to myself, “Yay! This should be the last one!” After it was dry, I’d feel the overspray texture and decide to sand it and spray again. Sand, spray, repeat. Eventually, I decided to “let” Nate do the final coat. He has more practice with the spray gun and is therefore better at applying just the right amount of finish. Look at how beautifully it turned out!

.

This picture was taken from the spot where my chair was sitting in the first picture. I thought you might enjoy seeing the spray booth in context with the rest of the garage. Nate is busily working on the second bookcase. Unfortunately, its hiding behind the left “wing” of the booth. You can see more photos of it in this picasa album. You can see more photos of my chair in progress in this album.

Whew! Its amazing how much simpler the process seems when you write about it later.

In hindsight, this particular chair might have been a poor choice not only for my first upholstery project, but also my first spray finish project. There are so many surfaces and angles that its tough to remember what you’ve sprayed already and what you haven’t yet. Luckily, things have been going great so far and I’m really proud of how its turning out. I’ve got my fingers crossed that I’ll be just as happy with the upholstery results.

Feel free to leave upholstery tips if you have any! I’d love to read them.

0

Liz Learns that Reupholstery is Harder than it Looks – Part 1

January 2, 2011

A couple weeks ago, I bought a chair and (nearly, but not quite) matching loveseat at the same Surplus Sale where we bought 55 keyboards for the infamous bartop. Nate is really gung ho with the woodworking so I figure I better learn upholstery before he gets around to building us couches and chairs. This chair was cheap, smallish, and somewhat simple looking (or so I thought), so I figured it would be a great candidate for my very first upholstery project.

Here is the chair in its “Before” state.

.

And here is the chair in its natural habitat (post-Christmas mess and all). I’m only sharing this because I’m confident that this view of the living room is going to improve dramatically over the next couple months.

.

Let’s hope Natasha likes the end result just as much. At the very least, it will have a plumper cushion.

.

This is the new fabric we chose for the chair. I had originally intended to find a yellowish-greenish pattern since I like this “original” color so much next to the wall color. But the store we went to didn’t have a huge selection and we weren’t feeling patient enough to order something. Nonetheless, I’m happy with our hasty decision.

.

Uh oh. We’re in the garage now. I smell doom and destruction. Oh wait, thats just the shellac fumes from Nate working on the bookcase that will also go in the living room.

.

A few alternate views:

.

And the “Property of ISU” sticker that adorns so many items in our home. We go to the Surplus Sale a lot.

.

All right. Time to get to work.

.

Next time I’ll get real staple-pulling tools.

.

Hey look! There’s some green under there.

.

Two miserable staple-pulling hours later, I remembered to  grab the camera again.

.

If this is what it takes to get buttons on the seat back, my finished product will not have buttons.

.

I count at least 11 staples holding that string. I know I’m new at this, but that seems a bit excessive, right?

.

Eventually I got the chair completely stripped down.

.

Then I spent several more hours sanding it. Can you tell that I started at the bottom and ran out of both patience and sandpaper as I made my way to the top?

.

Our vacation is officially over as of tomorrow morning. We might not have checked everything off of our to do list for this week, but we definitely accomplished a lot. Especially considering our time off was flanked by holiday weekends. My chair project is moving along, the  new bookcase is in the living room (minus the shelves), progress is being made on wedding thank you notes, and a full carload of stuff was taken to Goodwill. Not bad, eh?

1

The First Bookcase

December 31, 2010

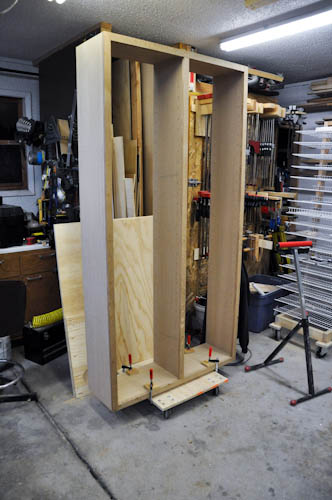
I have a new project.  Well, its been on the list for a while, but I’m just now working on it.  Again, less just now, and more for the last two months.  I’ve been so wrapped up in this project that I haven’t had time to write about it.  But Liz and I have taken lots of pictures.  Current count is 698.  To help keep the masses of followers happy (small masses), I have put up the pictures on a picasa album.  They will be updated regularly.  They will also be edited and filtered at some point in the future.  Hopefully this bookcase will be completed shortly and I can start in on the second one.  Enjoy.

0

Obligatory Post about the Obligatory Christmas Treat

December 31, 2010

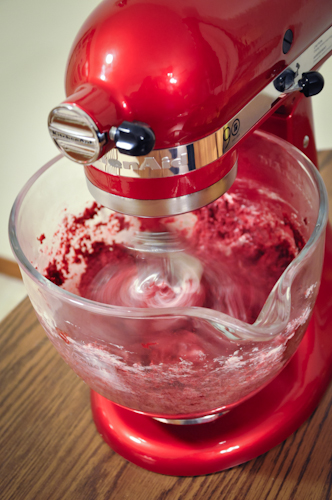
Is there anything more glorious than red velvet cake batter in a red mixer?

Why yes there is. Red velvet cake plus an entire can of cream cheese frosting in a red mixer.

For Christmas I made Bakerella’s famous “Red Velvet Cake Balls” recipe again. After 4 years of making them, they have basically become a holiday requirement in my book.

I missed taking pictures of the rest of the process – Nate and I both had pretty messy hands and it would have been a shame to get our new camera all gooey. But I made up for it by taking lots of photos of the cake balls being enjoyed in their completed state.

So much tastier than the fake cheesecake her dad gave her.

0

Happy Holidays!

December 29, 2010

Nate and I have finally finished our Christmas Marathon. This year we attended 6 festivities. Or I guess 7 festivities if you count our own Christmas Eve morning mini-party for the two of us (gifts + egg nog french toast + bacon = a party, right?). Fortunately, no two parties were on the same day. Unfortunately, no two parties were held in the same city back to back. So we did a lot of driving. We survived, but we’re glad that we both took vacation this week to recover and tackle some projects around the house.

Although we didn’t spend a lot of time at home to enjoy it, I finally got a “real” Christmas tree. 10 points for anyone who can correctly guess what the garland is made from.

Natasha loves the tree. We find ornaments all over the house.

Do you see that little bit of pink on the plant to the right?

Those are buds on my Christmas cactus. It had been living at my parents’ house for nearly 9 years until my mom made me take it earlier this year. I was afraid I had killed it months ago. Those buds are my little Christmas miracle.

I hope your Holiday(s) were wonderful!

2

A Bar To Come Home To

December 15, 2010

When Liz and I first bought our house, it included a wonderfully horrid attempt at a wet bar in the basement.  I’m sure that who ever built it thought it was beautiful (much like how all parents think their babies are beautiful).  It had some absolutely stunning bead board from the local home center plastered across the front, and some sort of laminate applied to the plywood top.  They had gone to the effort of putting in drywall on the back side, and an itty bitty sink.  The sink isn’t terrible, at least functional, but on the smallish side.

Somewhere along the line Jim (dear old best friend Jim, who has probably encouraged more than a few irrational ideas) and I thought that we could do better.  Liz and I had decided to completely redecorate the basement after our last bout with water from a frozen pipe, and didn’t want an ugly bar to detract from the rest of the basement.  Paint was applied generously, carpet removed and replaced with vinyl stickers that look like wood, and the bar was judiciously destroyed.  We left the 2×4 frame and painted it black.  The new basement was all about things being black, and dark, and awesome.  And nothing is more awesome than black.

With an epic black 2×4 frame, more wood was applied.  A skin if you will, of rich brown birch plywood.  This time we only applied this to the outside face of the assembly.  We wanted more storage on the back side, and had some crazy ideas about how to make it happen.  Upon our skin a black oak trim was applied.  It was black, and oaky, and deep, and dark.  Unfortunately we also discovered how hard it is to get wood to be perfectly black.  Go to your local home center and look for stains (not paint) that achieve a full uniform black as night look.  Back already?  Hard to find.  You might have stumbled across stains labeled as ebony.  This is but a mere illusion of deep, and dark, and black.  To fully achieve black you need two things, pure black dye, and india ink.  India ink is officially the blackest thing I have ever found.  Light is absorbed to never be seen again.  So after much blood sweat and tears we had black trim, and it was applied, and It.  Was.  Awesome.

But this left us with a quandary, this epic, dark, black bar needed an appropriately epic top to match it.  Since Liz and I are children of the internet, we plumbed the depths to find something, anything to fulfill our bar top needs.  Liz found a nifty little end table that someone topped with dominoes.  Gears churned, wheels engaged and squirrels sped forth into the night with a previously unknown passion.

We could put things in the top.

Our minds raced with the possibilities, dominoes were cool, but already done.  Coins and bottle caps were so last decade.  We needed something original, something truly epic, and us, and never before seen.  Enter ISU Surplus.  The mecca of all things scientific and discarded at ISU.  Here there were all sorts of electronic gadgets which could be embedded within a resin tomb.  We had been collecting nifty circuit boards from which we were going to build a sculpture, and we thought about using some of those.  Unfortunately to cover the top of a bar, you need some fairly significant square footage.  I don’t know if you’ve noticed, but electronics are continually getting smaller, and thus circuit boards keep getting smaller with them.  What else do people get rid of, but hasn’t been getting smaller over the last decade?

The lowly keyboard.  And not just any keyboard, but the most generic black keyboard that has been more mass produced than even iPods.  Yes, 55 of them in all were procured.  You see, keyboards have a wonderful array of perfectly square keys.  They are even labeled with their function.

Pretty Pretty Keys

Plywood was cut, trim was attached, and we had a void to fill.  As I mentioned earlier, we had 55 keyboards.  If you count the number of square keys on your keyboard you will come up with something in the ball park of 80.  This isn’t a small number (for those who are bad at math, 55 * 80 = 4400).  Weehee!!  That is a lot of keys to individually place in an upright fashion while creating some sort of pattern.  Speaking of patterns, what kinds of patterns can you think of creating with keyboard keys.  I’ll give you a moment.

I’m sure you didn’t think of something as awesome as we did.  A word search.  I’ll repeat that.  A word search.  Getting drunk will never be the same again when you can entertain yourself and friends by trying to find crazy things in front of your face.  I’m sure people look ridiculous while searching for hidden text, but we are having a fabulous time drinking, so it doesn’t matter.
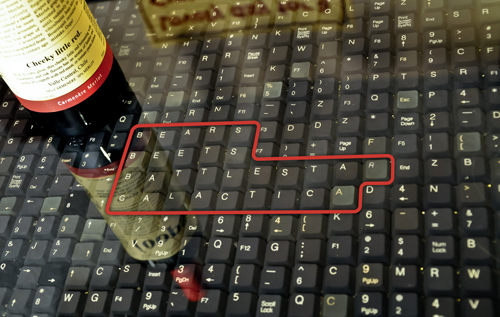
Beats Bears Battlestar Galactica

As you can see here, keyboard keys are small, and as I mentioned earlier, there is a lot of space to cover.

Epic, and dark, and deep, and awesome

About that much space. (Looks pretty sweet doesn’t it?)

How does one go about creating such a behemoth of a word search you say?  One might expect to plot out each individual key with graph paper to maximize the level of fun that could be contained per square inch, thus achieving unheard of excitement.  But then you just start hacking away at it because you’ve already put down three beers and need somewhere to set your bottle sooner rather than later.  Fortunately Jim and his wife Mariah were drinking with us that night and we talked them into helping us lay everything out.  16 hours later the keys had been placed.  I am actually serious about 16 hours of placing keys.  Each one being hot glued down to prevent it from being knocked over as we poured out the resin fill.  Many, many nights I sat hunched over the bar.  Glue gun in hand, the smell of my burning flesh filling my nose.  Placing each. Little. Key.  Soon you start to see letters floating all around you, swirling and cascading down.  They make such a pretty sound when they are being poured out.  Like a cascade of shards of glass coming towards you.

So there we were, a sea of keyboard keys secured to a piece of plywood.  To gaze upon it was to know awesome.  The keys each had a different pitch to them which made the entire surface into an undulating sea of keys.  Unfortunately it made for a horrible surface to place a drink on.  Bottles kept falling over, things got lost in the crevices (imagine your couch cushions, but times a 1000.  There must be a small fortune in pocket change in there.) and it just generally wasn’t as awesome as we would like.  Enter large volumes of resin.

Epoxy resin is interesting…

I should probably finish that thought.  Epoxy in large volumes is interesting to work with…

Ugh, I guess you want a better explanation than that too.

What most people think of when you say epoxy, is some two part adhesive that sticks any two things together.  Now imagine that in larger quantities, like on the order of gallons.  What you probably didn’t notice when working with your dainty little adhesive, is that epoxy is an exothermic reaction.  For those without an engineering background, that means it produces heat.  Enough to melt plastic, burn your hand, and generally cause lots and lots of problems if you try to play with too much at one time.  For the spacial minded people, you are probably thinking about the volume that these keys take up.  Your keyboard is much like an iceberg, there is a lot below the surface that you don’t see.  The keys we used sit almost an inch tall.  At almost 11.5 square feet that is 1656 cubic inches of volume to fill.  Keys are a whole lot of air, much like many of our leaders, and thus don’t really take up much useful space.  A gallon is defined as an 8 inch cube, or 512 cubic inches.  With some magical math we end up with 3.2 gallons to fill the volume.  Thats a lot of tubes of JB Weld.

When working with commercial volumes of resin you must take your time.  You pour out an eighth of an inch at a time.  You mix till your arm goes numb.  You cry to the heavens for salvation from this agony.  Then you realize that you already spent 16 hours placing itty bitty little keys by hand, and you succumb to the realization that it is winning.  The project is beating you.

At last, the liquid reaches the top.  You are done.

I drink to you good sailor

Pour yourself a glass of wine, you might as well enjoy what is left of your sanity.

8

Think fast!

December 15, 2010

Just in case anyone happens to visit this blog today…

I just entered our bar top project into a contest on the Readymade Magazine website, here. Unfortunately, I just realized voting ends today. As you can imagine, we’re a little behind on votes. But it wouldn’t take many to bump us up there with some of the more punctual DIYers. So if you have a minute and don’t mind giving out your email address to yet another website, Nate and I would really appreciate your vote.  Here’s a link, just in case you missed the first few: VOTE HERE

Pretty please? Thank you!

P.S. Nate is writing up his take on the project to post here. It should be up relatively soon.

5